Formlabs Hackathon!
Group of 8: 3 days
Background
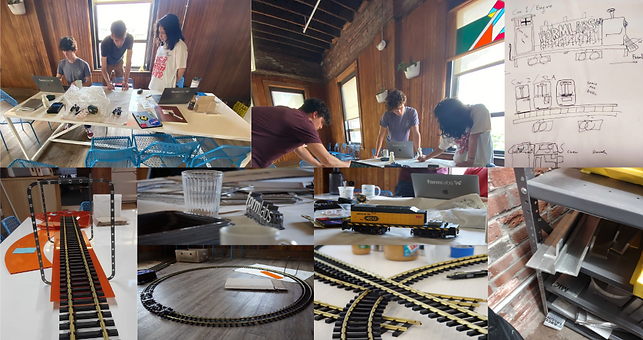
For this year's annual hackathon, a group of three began planning a model train inspired by the Wegmans classic. None of us knew much about trains so for a few days, we did our research on the different model trains available and what location we would be allowed to set this up. As we neared the beginning of the three-day hackathon event, our team began to grow. With most materials purchased beforehand, the three days ran a bit more smoothly. The three days consisted of lots of coffee, prototyping, and 3D printing
Task Distribution
Individual
Group
-
Research conclusions
-
The original three members decided on a G-scale model train
-
After the team was finalized, we decided to purchase the tracks and the caboose from USA Trains
-
-
During the three days of the hackathon, everyone worked on their designated tasks, with teammates jumping between tasks to help each other our
-
Due to the time limit, we would step in if someone was needed somewhere else (i.e. if someone with more Machine Shop experience was needed for a specific task)
-
We spent the last day working primarily on assembly
-

-
Research
-
Different train models and gauges
-
Cost of purchasing the caboose and track vs building it
-
-
Pre-building planning
-
Contact facilities and WEX to determine which spaces are cleared for usage
-
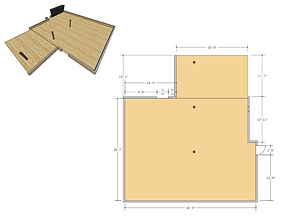
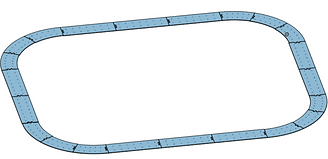
CAD a model of the kitchen area and a model of the train tracks
-
CAD a model for the layout of the train tracks and begin modelling the train supports and platform over which the tracks will be (up to this point I was the only MechE)
-
Generate a list of materials needed for the Machine shop (i.e. acrylic, wood, printer resin)
-
-
During (and post) Hackathon
-
Cut the acrylic pieces and wooden pieces used for a prototype of the supports
-
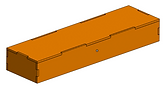
Laser cut the cover for the caboose
-
Cut aluminium pieces to support the power box
-
(Lots) of iteration to the CAD model of the supports and trusses
-
Machine materials needed
-
Re-model supports and generates a to-do list for project completion from an engineering perspective (i.e. what materials and shop equipment to use)
-
Phase I: Planning
I didn’t know much about model trains but was very curious about the hardware used to make them run and how on Earth people elevate them near the ceiling. The original three members of the Hackathon spent some time determining which model train was best suited for our application. Ultimately, we agreed upon a G-scale train for its size (not too small like the popular HO scale but large enough to make it visible), ability to control using a remote, and price.
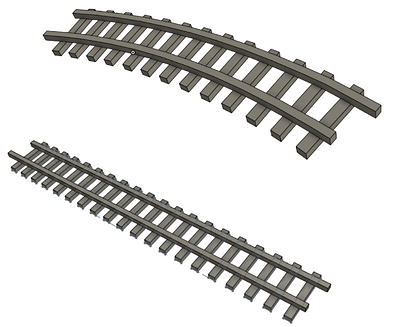
Based on the length of the Hackathon, we decided it would be best to order a caboose and tracks. I modelled the supports for the tracks based on the floor plan Facilities provided me.
Phase II: Hackathon
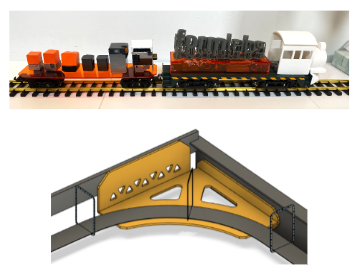
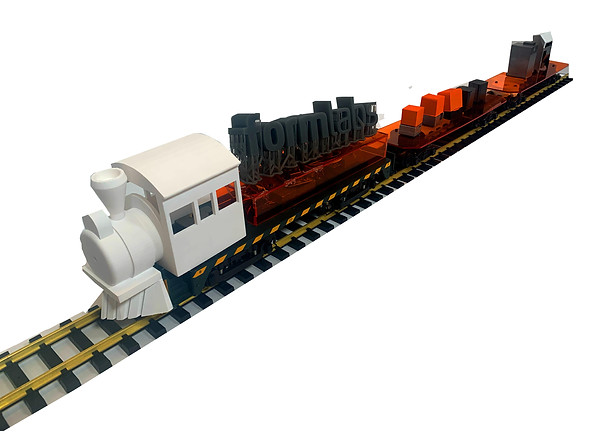
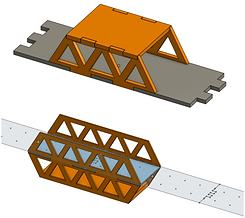
My main responsibility during the hackathon was to model and test the supports for the train tracks. The weight of the caboose alone was ~5 lbs and the train would be placed in the kitchen area. For the prototyping, ¼” and ⅛” acrylic was used, so I modelled the supports, truss, and train shells with joints to fit like puzzle pieces for laser cutting.
Outcome: Track supports needed to be wider and account for the overhang of the caboose during turns, additional supports would be needed over the cracks of the train track supports in which the laser cut joints met, and some kind of wall extension would be needed for the curves.
Phase III: Project hand-off
Three days (two of which were during work days) were unfortunately not enough time for us to elevate the train. Two full-time employees showed interest in continuing the project for Hackathon 2023, so our project lead created a document outlining what else was needed and I listed out the steps required in the machine shop to finish the physical building:
-
Order and cut tracks out of ¼” acrylic (shop ran out)
-
Laser cut the wall extensions with the .dxf file I added to the drive OR use a Shaper with the SVG file also found in the drive
-
Re-print wall mounts using Nylon 11 or 12
-
Extend the cords on the power box to avoid using extension cords
-
Elevate the tracks!
After another iteration of the train track supports, two team members bought ⅜” plywood for the wall extension and I began re-cutting acrylic. Scraps from our Form 4 wash were used as brackets and I cut some additional supports for the laser-cut joints modelled by a full-time employee. To hold the brackets to the walls, all members began running overnight prints using Draft resin. I also machined some aluminium to hold the power box over the wall.